Connecting Plug-in Modules
You can connect up to four optional plug-in modules to one LR8450/LR8450-01.
Connect modules according to the number of channels necessary for measurement.
|
WARNING |
|---|
|
Do not remove the connector cover when not connecting plug-in modules. Failure to do so could cause electric shock or damage the instrument or plug-in module. |
|
Turn off the instrument and disconnect any cables before connecting or removing any plug-in modules. Failure to do so could cause electric shock or damage the instrument or plug-in module. |
If connecting multiple plug-in modules, do so as indicated in the diagram below.
|
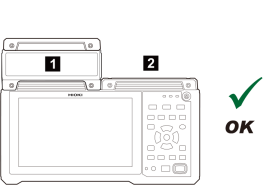
When connecting 1 plug-in module Connect the module to slot 1 or 2.
|
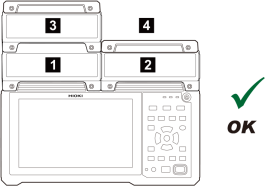
When connecting 3 plug-in modules Connect the modules to slots 1, 2, and 3 or 1, 2, and 4.
|
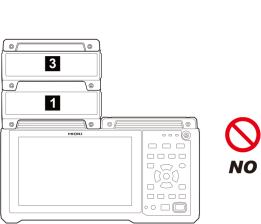
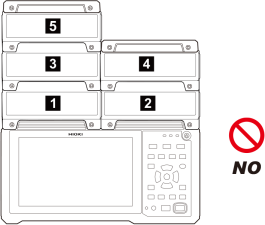
The connections described below are not available. The screen will show an error message.
|
When connecting 2 or more plug-in modules on one side
|
When connecting 5 or more plug-in modules
|
IMPORTANT
Changing the module configuration may reset the channel settings.
Check the settings.
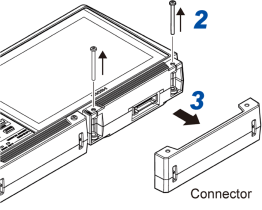
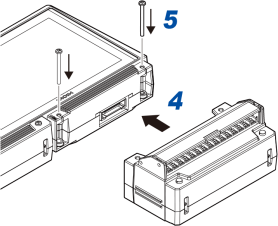
Connecting plug-in modules to the instrument
Compatible modules: U8550, U8551, U8552, U8553, U8554, U8555, U8556, U8557
You will need: a Phillip’s head screwdriver (No. 2)
|
|
|
|
|
Wiring cables to plug-in units and then connecting the plug-in units to the instrument
Plug-in units can be disconnected from the instrument when wiring cables to their input terminals.
It’s easier to connect plug-in units to the instrument after cables have been wired to the unit.
Adding plug-in modules
You can additionally connect another plug-in module to the module attached to the instrument.
Connect another module to the attached module in the same way as to the instrument.
IMPORTANT
Plug-in modules ship with two spare screws (M3×35 mm). Exercise care not to lose them.